Pages

Saturday, October 24, 2015

5 Fun Grouping Strategies

Make grouping students fun and stress free with these 5 tips and tricks. Tip #5 is my favorite and it's free!

Have you ever felt like time is getting away from you?  That is how felt when I saw the date of my last blog post!  I can't believe how long it has been since I've sat down to write!  With school starting and a HUGE home project, I've struggled with fitting everything in.  I'm happy to say that the home project is completed and I'm crossing my fingers that I can get back on a regular blogging schedule.


Do you ever find yourself in a student grouping rut?  Well, I have some fun, easy to prep, grouping strategies that will make your students cheer!

There are times when, as teachers, we have to make careful, purposeful grouping decisions,   BUT...  there are other times when letting fate decide is the way to go!

Here are 5 cheer-worthy ways to randomly partner up or group your students:

1.  Postcard Puzzle Pieces


Make grouping students fun and stress free with these 5 tips and tricks. Tip #5 is my favorite and it's free!

Make grouping students fun and stress free with these 5 tips and tricks. Tip #5 is my favorite and it's free!

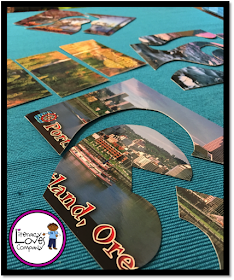
My students LOVE when I make groups using postcard puzzles!  I pull out the envelop and they begin to wiggle with excitement.  Making postcard grouping puzzles is easy.  I have several sets of these puzzles.  One for each number of students I want in a group.  I have a set that makes groups of 3, one for groups of 4, and one for groups of 5, etc.

First, obviously, you'll need postcards!  I have a set of postcards from around the state that I live, another a student brought me from her trip to Italy, and still another with artwork that I bought at the local art museum.

Second, figure out how many students you want in a group and how many postcards you will need.  For example, if you have 24 students and you want groups of 4, you will need 6 postcards.

Third, cut each of the postcards up into however many students you want in each group.  The pieces don't have to look like puzzle pieces, but I try to make them look interesting.

Most postcards already have a plastic coating, so this makes them more durable and you usually don't have to laminate them.  I keep my puzzles sets in manila envelopes with the grouping information labeled on the outside.

Sometimes you may not have enough puzzle pieces or too many.  I just adjust as needed.  I make sure that I have enough puzzle pieces for everyone, but pull out any of the extra's.  The student who gets the one lonely piece gets to choose whichever group they would like to join.  It's like getting the golden ticket!  Sometimes I take out just one or two pieces and let the class know that some groups will be one piece short.  It just depends on how many kiddos you have and how many students you need to be in a group.

2.  Popsicle sticks (or, as my students like to call them, "The Sticks of Doom.")
Make grouping students fun and stress free with these 5 tips and tricks. Tip #5 is my favorite and it's free!

I write the name of each of my students on a different large popsicle stick.  When making groups this way, I pull the sticks out of their container in the amount I want in each group.  This is a quick way to make groups!


3.  The Sticks of Doom take 2

Make grouping students fun and stress free with these 5 tips and tricks. Tip #5 is my favorite and it's free!


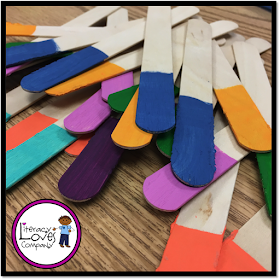
Another way to use popsicle sticks to make groups is to paint the end of each popsicle stick a color.  For example, paint 4 sticks green, 4 yellow, 4 blue, etc.  Students pull sticks and group themselves by the color they pull.  If you have an odd number or an extra student,  you can create a "golden stick".  The student who pulls the golden stick gets to choose which group they would like to join.

4.  Blind Grab
Make grouping students fun and stress free with these 5 tips and tricks. Tip #5 is my favorite and it's free!

In a paper back or other opaque container, place colored tiles or pattern blocks.  Students blindly pull out colored tiles and arrange themselves in groups based on the color of the tile or the shape they pull.

Other Options:  You can also do this with candy.  Go to the bulk section of your grocery store and buy some of the mixed candy.  Put candy in the bag in the amount you will need for grouping.  For example, if you need groups of 5, put in 5 peppermints, 5 Jolly Ranchers, and 5 caramels.  Kids love this way of grouping!


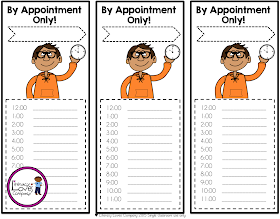
5.  By Appointment Only!

Make grouping students fun and stress free with these 5 tips and tricks. Tip #5 is my favorite and it's free!


You've probably heard of appointment clocks or clock buddies.  In my class we just call it "Appointments".  Here is how it works:

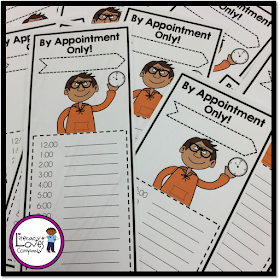
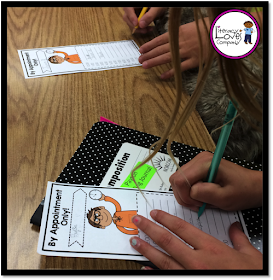
Each student gets a "By Appointment Only!" bookmark.  Students walk around the classroom and make appointments with each other for the times listed on the card.  For example, if Jane and Steve want to make an appointment, they find a time that they are both open and then Jane writes Steve's name on her sheet and Steve write's Jane's name on his sheet and that time.

I usually give about 15 minutes or so for students to make their appointments.  When most students are finished, I take over and help match up students based on what appointment they still have open.  Sometimes I have to end up making groups of 3 which still works.  I only do this at the end though.
Make grouping students fun and stress free with these 5 tips and tricks. Tip #5 is my favorite and it's free!

When all of the appointments have been made, I gather the bookmarks and laminate them.  I hand them back to my students and they become responsible of them.  When I need students to work in pairs or share their work with a partner, I roll one or two dice and call out the number rolled.  Students meet with the person who is scheduled at that time on their appointment list.
Make grouping students fun and stress free with these 5 tips and tricks. Tip #5 is my favorite and it's free!
You can grab a FREE DOWNLOAD of these bookmarks as a "Thank You!" for visiting Literacy Loves Company!

Keeping students engaged and helping them to work with a variety of people is one of the many tasks we do as teachers.  I hope that one or more of these grouping ideas helps make that task a little more interesting for both you and your students.

I know that there are MANY,  MANY more great grouping ideas out there!  I'd love it if you would share yours in the comments below.

Thanks again for visiting!


NEW PRODUCT ALERT!  
Are you a 3rd - 4th grade teacher?  Check out the newest resource in my TpT store:

This product includes 5 different MULTI-STEP word problems connecting to special days and events in the month of November! Each word problem story has 4 problems for easy differentiation . The provided answer sheets guide students to focus on parts of each problem and break them down into small tasks throughout the week. In just 5-10 minutes each day, students work on CCSS math standards while improving their mathematical practices. 


Sunday, September 6, 2015

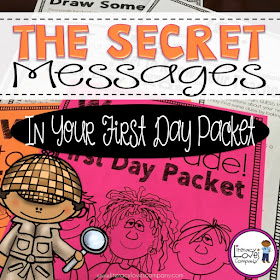
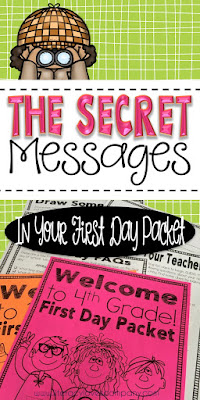
The Secret Messages in Your First Day Packet

The first day of school is an important one.  Make sure your first day packet is sending the right messages to your students.

Most of us do it.  We place a packet of papers on our new student's desk for the first day of school.  These packets have a dual purpose.  They give students something to do as we, the teachers, are greeting and guiding students to their new seats, instructing about supplies, meeting parents, etc. and they also give us some really good information about students.  

But what messages are these packets giving to our students about us?   They are usually our students' first insight into their school year and their teacher,  so the subtle communication they send is important and helps set the stage for the year.  

I just put together my first day packet last night.  I have been using, basically, the same packet for years, but this year I recreated the whole thing.  I wanted to share my packet with you and explain how I use it.  Also, in the caption sections, I added what I hope my packet says to my students.  

FRONT COVER
The characters on the front are the same as the ones on the window by our front door.  I'm planning on incorporating them into our daily conversations this year.  You know when you need that stand-in name...  like "Johnny" or "Sally"?  Well, we have Jasmine, Bobby, and Adam.   

"We're going to have fun this year!"

4TH GRADE FAQs
This page is full of frequently asked questions for the first day of school.  I put little checkmark boxes for students to check off when we have discussed them.   This page is not only for the students, but it also helps me to remember what things I need to cover.  Throughout the first couple of days of school, I try to get through all of the questions.  

"We have a lot of business to take care of!  Knowing the routines and expectations for the year is important and I want you to have all the information you need to have a great year!"
 GET TO KNOW YOUR TEACHER
During the chaos of the first morning, students work on this sheet while they are waiting for class to begin.  When the craziness has died down and the parents have left, I introduce myself to the class using this sheet.  We go through the questions and I answer each of them adding stories and sharing a bit of my life with my students.
"I'm a person, too!  I have a life outside of this classroom and I want you to get to know me."
CLASSMATE WORD SEARCH
The goal of this page is to get students talking to each other that first day.  I use to put each student's name on the list, but this year I decided to leave them off and get the students up out of their chairs to talk to each other and fill in the name list themselves.  I realize I have some new students, students with special needs, and some very shy students.  I encourage students to help each other and hope to "buddy up" some of the students I already know with students who are new to the school to help them out.   

I created the word search using PuzzleMaker from Discovery Education.  It is really simple to use.  This puzzle has a secret message that students can figure out after they have found all of their classmates' names.  Our secret message is "Be Awesome".  
You and your classmates are important!  It is okay to work together to solve problems."  
 DRAW SOMETHING
This page give me a little insight into who my creative thinkers and problem solvers are!  Students use this page to draw a picture that shares a little something about them.  They try to incorporate the squiggles (Thank you HelloFonts!) into their drawing.  At some point during the first couple of days, we meet as a whole class in our community circle and students share their pictures with the class.  I collect them and display them on a class wall for students to enjoy and for parents to see at Back-to-School night.  You can grab a free download of this page HERE!  
"I want to learn about you and your life.  I also want you to feel free to be creative!"
 BACK-TO-SCHOOL SURVEY
This is the last page of the packet.  This page gives me some insight into my students' attitudes and feelings about school.  I am always curious about which subjects students feel they are good at and which ones they think are difficult for them.  This page is a way for my students to communicate to me how they feel about school and also tell me anything they think is important for me to know as their teacher.  I collect this page and read through each one.

"You and your success this year are important to me.  I am here to help you and want you to know that you can share with me what you need to have a great year!" 

As you can see, your first day packet isn't just about keeping your students busy on that first morning.  It is also a valuable communication tool for both you, the teacher, and your students!  Each page you include sends a message to your new charges about who you are and what you believe is important as their teacher, so make each page count!  

Of course you could create your own first day packet, but why go through all the trouble when I've just added an editable version of it to my TpT store? 

The first day of school is an important one.  Make sure your first day packet is sending the right messages to your students.

This packet includes additional pages not shown in this blog post.  Click HERE to take a look!   


The first day of school is an important one.  Make sure your first day packet is sending the right messages to your students.
Please Pin Me!  


Monday, August 31, 2015

Classroom Reveal 2015!


I'm happy to be linking up with Shroeder Shenanigans in 2nd and Lucky Little Learners for their #2getherwearebetter linky party!  This month we are sharing CLASSROOM REVEALS!  


PART I

Another school year brings another chance to mix things up with my classroom decor!  I'm excited to take you on a pic-tour of my room!

Full disclosure here...  I have only been back in the classroom for about 3 days so you will probably notice boxes here and clutter there...  My room is still in process.   This is why you won't see a picture of the WHOLE room at once and why I am calling this "Part I".  I've been working around the perimeter and am just now starting to get the student tables cleaned off, but I have some great decor and organizational ideas to share with you, so here we go!  

When you walk up to my classroom you will be greeted by "Bobby", "Jasmine", and Adam.  These are some of my Kool Kat Kidz clip art characters.  I got the idea for "blowing up" the clip art from Schroeder Shenanigans in 2nd.  


My goal for these three is to change up the message each day or two.  Eventually, I am going to use these characters and speech bubbles to start introducing quotation marks to my 4th graders.

Next up, you will find these "Habits of Mind" posters greeting students as they walk through our classroom door.  A little positive inspiration to start the day!


As you walk into our classroom you will see my teacher corner.  Last year, I tried to give up my desk, but I only lasted until winter break.  I found that, without my desk, I felt lost and disorganized.  I don't sit at it much, but at the end of the day, I love my corner.  This year, I added a new rug and a few new accents.  
I finally purchased a rolling cart from Ikea!  I love it and think that it will be very useful as I work with students in different parts of the room.  

 Another clip-art "blow-up"!  This one is a custom figure I made of myself.  :)
In my blog post, Ten Steps to Creating a Zen Teacher Space, I talked about some simple ways to create a peaceful area in your classroom that you'll love! 
Next up is the classroom library.  Can you tell I love books?  
I organize my class library by genre.  I also pull some groups of books by the same author and create some author baskets.  I add anchor charts, created with the students, to the wall throughout the year.  

The next few stops on our tour are a few stations I have set up throughout the room.  Here you have the writing station.  I have some reference materials, different kinds of paper, greeting cards, and story starters all gathered for students to use.  
 This is my science station!  I have a small microscopes and several items for students to explore.  The objects can be changed up as the seasons or units of study change.
 This area of the room is for community supplies and math materials.
 I organize my colored pencils and crayons by color.  This makes it easy for students to find a certain color.  They don't have to dig through a big container of pencils for a blue pencil.  Great time saver!
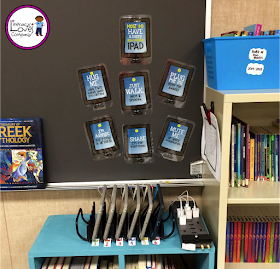
Here we have our tiny-tech center!  Last year my class was fortunate enough to get a iPads funded through DonorsChoose.org.   I found this great (FREE) set of iPad rules by Digital Divide and Conquer
Not sure how to organize those devices?  Tired of the cords always tangling?  Classroom organization pic-tour!
I used this little Ikea dish drainer to create a little charging station.  
Last up, we have my math wall.  I got the idea for this great board from The Teaching Sweet Shoppe!  Last year, I started math workshop with my students and loved it!  I can't wait to start it with this year's group!  My board isn't finished yet.  I've left space for math objectives, vocabulary, etc.
 This board is located on a magnetic blackboard.  I've used magnet tape to mount all of the parts of this set.  This makes it very easy to move things around.

That concludes our pic-tour!  I hope that you found an idea or two that you can take back to your own classroom.  Check back soon for Part II!  I'll be sharing my student cubbies, table set up, and first day packets!   


Thursday, August 6, 2015

Teacher Time Savers Linky Party

Are you constantly searching for more time in your school day?  Here are some Teacher Time Savers!
"Time is what we want most, but what we use worst"  ~ William Penn
We all know that time is precious.  As teachers, we are constantly searching for more of it and bemoaning the lack of it.  I'm happy to host a linky party dedicated to teachers sharing their time saving tips, tools, and products with other teachers.  {Guidelines for the linky party are at the end of the post.}

Does this scene seem familiar...

It's lunchtime and you've just seen your students off to the lunch room.  You quickly prepare for your next lesson, answer a few e-mails, and maybe even grade a pile of papers.   Oh, wait!  You still need to eat lunch!  You head to the staff room, grab your lunch, and search for the microwave.  Ah Oh!  There's someone's ravioli rotating in the microwave and a line three people deep waiting their turn.  What to do? 

I found the solution and it has been the BEST time saving purchase I made this year...
Are you constantly searching for more time in your school day?  Here are some Teacher Time Savers!
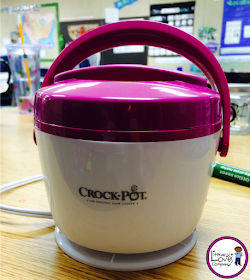
Yep!  A Crock-Pot!  But this isn't your momma's crock-pot!  This is actually a mini crock-pot specifically made to heat up small portions of food.  The pot hold 20 oz. which is an ample serving.  There is an inner liner/container that is removable.  I usually keep the base at school and the liner travels back and forth between home and school.  

The crock-pot is perfect for soups, stews, pasta, and almost any leftover.  I plug mine in when I get to school in the morning and by lunch time my food is nice and hot and ready to eat.  No more waiting in line at the microwave.  Big time saver!  

At the time of this post, the crock-pot pictured above was selling for $19.94!  Well worth the money for the time it will save you each day.  By the way...  Crock-Pot is not paying me to say any of this.  I just want to share with you all a tool that has made a time saving impact on my day.  It has been such a blessing to know that my lunch is going to be hot and waiting for me when I am ready to eat.  

So that is my Teacher Time Saver!  Please check out the blogs linked below for more tools, tips, and products to add minutes to your busy day!  

******************************************************
**********************
****
Looking to save time on your spelling station prep?  Check out my Easy Prep Spelling Stations.  20 Stations including word sorts, activities, and board games.  Includes word lists!  Download the FREE SAMPLE from my TpT store.  Click on the pic to be taken to the product descriptions.  


***
**********************
******************************************************

Want to join the "Linky" party?  Here are the guidelines to participate:

1.  Write a blog post featuring a Teacher Time Saver.  This could be a time saving tip, tool, item, or product.  
2.  Grab this graphic and add it to your post.
3.  Mention, in your post, that you are participating in the Teacher Time Savers Linky Party hosted by Literacy Loves Company with a link back to this post.
4.  Make sure you have a "pin-able" graphic in your post so that others can pin your idea.
5.  Use good linky party etiquette by commenting on this post and by visiting and commenting on the two blogs linked before you and the one after you on the link-up. 

Please advertise your blog posts on social media. 

Thank you for following the guidelines above!  
  
I will try to visit each of your blog posts.  I'm looking forward to learning about new ideas to save me time this school year! 

The linky party will be open through September 2015.   
******************************************************
**********************
****