Showing posts with label ELA. Show all posts

Tuesday, December 28, 2021

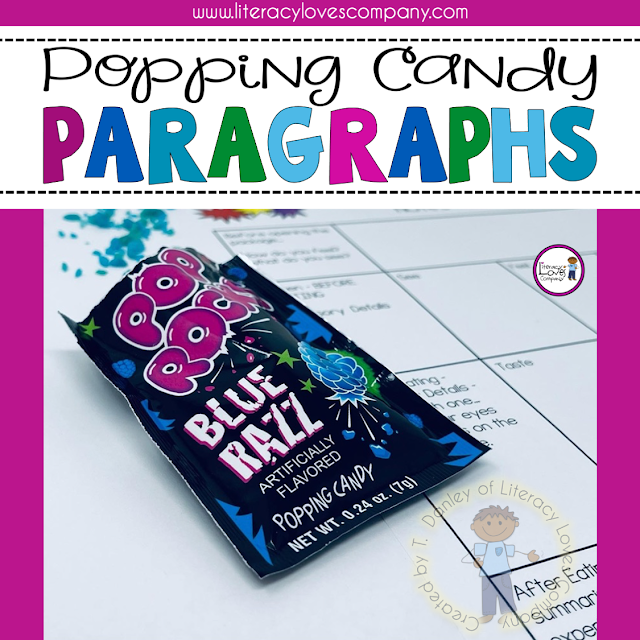
Popping Candy Paragraphs


Sizzle and Fizzle… Pop Rocks Descriptive Writing.


Sizzle and Fizzle… Pop Rocks! 

Upping the engagement and increasing the fun is a must for the dreary months of January and February (and March, April, and most of May here in Oregon).  Candy that pops and shocks is sure to be a winner and bring smiles to my kiddo’s faces!
                                Sizzle and Fizzle… Pop Rocks Descriptive Writing. 

I think I’ve only had Pop Rocks a couple of times in my life, not sure I’m a fan, but there’s something about the tingle and tickle on your tongue that makes Pop Rocks a hit with kids of all ages!  Eating this candy is an experience I’m excited to share with my students and, since I AM a teacher, turning it into a descriptive writing lesson was a no brainer!


Sizzle and Fizzle… Pop Rocks Descriptive Writing.


I found the Pop Rocks at my local Dollar Tree.  Much less expensive than ordering from Amazon, although I would have almost paid the extra $20 to not have to leave my house.  I was only able to find one flavor, but I'm okay with that. All in all, I spent $10 for 30 packages of candy.


I'm writing this post BEFORE I actually teach the lesson because I wanted to share it in case others are looking for an engaging activity for January. I'll come back and revise this post after I've taught the lesson to share updates, photos, and revisions I'd make. Stay tuned for that!


Thinking through this lesson, I wanted to peak student interest and give them a mystery to solve. For my hook, I'm going to play the sounds of Pop Rocks and have students try to guess what the sound is. This is sure to get students asking questions and get their brains thinking.


I also want to make sure students understood what descriptive writing is and why it is important to learn how to do it well. The lesson starts with an anchor chart to focus students on that objective.


(Insert anchor chart photo here.)


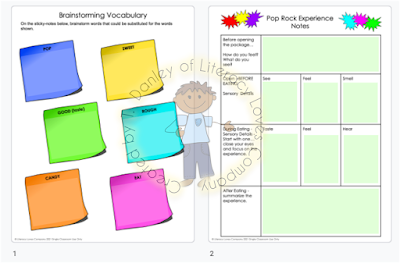
The first part of the lesson is focused on word choices, choosing million dollar words to replace those $10 words we use all the time. In order to facilitate this, I'm having students work in their groups to brainstorm synonyms for words they might use when writing about Pop Rocks.


I'm also planning on doing a "chalk talk" type activity. I'm going to place a large piece of butcher paper up on one of our classroom walls and students will be able to add their ideas, thus creating a large word bank for their writing.

(Insert photo here.)


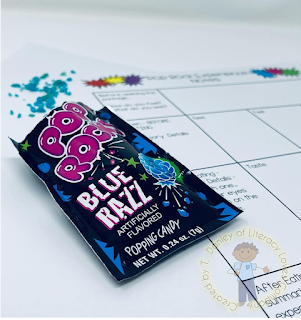
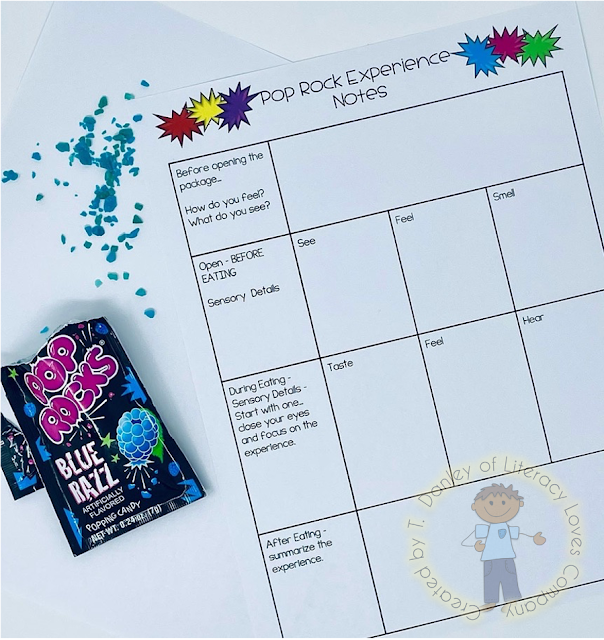
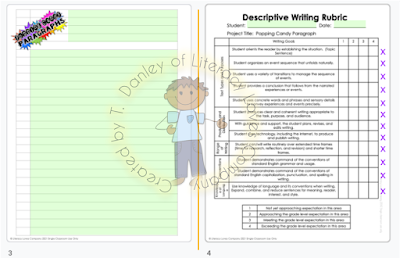
Now comes the exciting part! Students will get a packet of Pop Rocks and their notes page. Students will spend time focusing on sensory details while tasting their candy.


Sizzle and Fizzle… Pop Rocks Descriptive Writing.

During the second day, students will use their notes, the anchor charts, and the word bank to construct a descriptive paragraph about their experience. The notes page is perfect is a perfect tool to help students create a well written paragraph.


Crossing fingers that our school will remain in-person, but if we don't I am prepared!! I've also created a digital version of the student sheets and scoring rubric that can easily be assigned through Google Classroom. All I'll need to do is get the Pop Rocks to the kids and create a Jamboard for the word bank.
Sizzle and Fizzle… Pop Rocks Descriptive Writing.


Sizzle and Fizzle… Pop Rocks Descriptive Writing.

This year has been tough, so coming up with and teaching fun lessons for our students is so important.  This writing activity is easy to implement and a big bang for your buck.   

Sizzle and Fizzle… Pop Rocks Descriptive Writing. Literacy Loves Company

Sizzle and Fizzle… Pop Rocks Descriptive Writing. Literacy Loves Company
Thank you for pinning me!  


If you try out this lesson, I'd love to hear how it goes for you! 

Stay strong, Friends!  


Monday, February 8, 2016

Are Anchor Charts Weighing You down?

Do you have a sea of anchor charts in your classroom?  Looking for some tips, ideas, and inspiration to create, display, and store your anchor charts.


Hello.  My name is Tammy and I'm an Anchor Chart Addict.  Reading charts, writing charts, grammar charts, math, science, social studies...  you name it...  I've got an anchor chart for it! If you are like me, by the end of the year, you're drowning in a sea of chart paper!

Before I throw out the life preserver, here are a few anchor chart tidbits I'd like to share:
I'm artistic by nature and I think making anchor charts taps into that creativity.  Not only do anchor charts brighten my classroom, but they are also meaningful teaching and reference tools for my students.

I almost always make my anchor charts with my class.  I believe that there is more buy-in and ownership for the content if students are active participants in the creation of the charts.  When we make our anchor charts, I start with the title and design a border around the edge of the paper.  I read something, somewhere, a long time ago that said when you add a border, you keep your reader's eyes focused on the information within the frame.  If you don't have a border the eye may, more easily, drift from the page and we don't want that!
You'll not only find this Close Reading anchor chart, but many more ideas, tips, and inspiration for creating, displaying, and scoring anchor charts!

Colors are also important.  I don't pre-plan a color scheme, but that might be a good idea for the future.  I usually just pick colors I like, colors that fit my classroom, or colors of markers that actually have some ink in them (I need to get some new markers!).
Do you have a sea of anchor charts in your classroom?  Looking for some tips, ideas, and inspiration to create, display, and store your anchor charts.


My favorite markers for anchor charts are the Sharpie Flip Chart Markers.  They have a bullet tip and put out a lot of pigment onto the paper.  I also like Scentos markers because they... well...  smell good and in a fourth grade classroom, that means something!
In my classroom, anchor charts that are currently in use are pretty much displayed all around the room.  My math anchor charts are on the math wall.  My science or social studies charts are in that area of the room, and my ELA charts are on my ELA wall.  Charts that we are currently working on are usually displayed on our white board at the front of the room so that we can continue to add information to them.
Do you have a sea of anchor charts in your classroom?  Looking for some tips, ideas, and inspiration to create, display, and store your anchor charts.

You'll not only find this speech anchor chart, but many more ideas, tips, and inspiration for creating, displaying, and scoring anchor charts!

You'll not only find this writing  anchor chart, but many more ideas, tips, and inspiration for creating, displaying, and scoring anchor charts!

You'll not only find this Resolving Conflict anchor chart, but many more ideas, tips, and inspiration for creating, displaying, and storing anchor charts!

Once an anchor chart is completed or we have moved on to another topic, I move that anchor chart to the reference section of our classroom.  The anchor charts are stacked and stapled, one on top of each other, but still accessible for my students.  It is not unheard of for a student to go to that wall and look through the anchor charts to find some tidbit of information that they need for an assignment or project.
Do you have a sea of anchor charts in your classroom?  Looking for some tips, ideas, and inspiration to create, display, and store your anchor charts.


Here are some other brilliant display ideas from Pinterest Pinners:


Needless to say, but by the end of the year, I have a ton of anchor charts to deal with.  I feel like I'm drowning in a sea of paper.  Since I prefer to make my anchor charts with my students, I usually end up recycling all of them.  The last year or so, I've gotten a little bit smarter and started taking pictures of the ones I'd like to repeat with my class the next year.  I save these photos in a file name Anchor Charts on my school computer so that I can reference them the next year.

I've also seen a lot of great storage ideas on Pinterest.  Here are a few smart storage suggestions:


Here are a few more of my MANY anchor charts:
Find this anchor chart and many more plus ideas, tips, and inspiration for creating, displaying, and storing anchor charts!

Find this anchor chart and many more plus ideas, tips, and inspiration for creating, displaying, and storing anchor charts!

You'll not only find this behavior anchor chart, but many more ideas, tips, and inspiration for creating, displaying, and storing anchor charts!

Find this anchor chart and many more plus ideas, tips, and inspiration for creating, displaying, and storing anchor charts!

You'll not only find this behavior anchor chart, but many more ideas, tips, and inspiration for creating, displaying, and storing anchor charts!


Find this anchor chart and many more plus ideas, tips, and inspiration for creating, displaying, and storing anchor charts!
I hope you found some great ideas for your classroom.  Thank you for visiting!


Tuesday, June 30, 2015

3 Winners, 3 Way, 3 Day Giveaway!


Hi Friends!

It took me a year and a half, but I finally did it!  I posted my 100th product to my TeachersPayTeachers store!  That may not seem like such a big feat, but to me it was a milestone I was struggling to reach.

It took me about 2 months to complete this resource and it wasn't until school was out for the summer that I was able to put the time into it I really needed in order to give my buyers everything I think they needed to successfully teach students to compare and contrast folklore.


Okay... enough product pictures!  Let's talk GIVEAWAY!  To celebrate reaching this mini-milestone,  I'm giving away this resource to 3 lucky winners!  Not only will the winners get this unit (a $12 value), but I'm also giving them a resource of their choice from my Teachers Pay Teachers store (up to $5 value)!

Its easy to enter:

1.  July 1st - Comment on this blog post with the name of the product from my Teachers Pay Teachers store that you would like to win along with your e-mail address.   (Click HERE to browse my store.)

2.  July 2nd - Visit my Facebook page.  Like and tag another 4th or 5th grade teacher on the giveaway post for that day.  

3.  July 3rd - Visit me on Instagram (literacylovescompany) and like the giveaway post for July 3rd!  

Each day, entries will be closed at 5:00 PM PST and the winner will be announced by 6:00 PM.   Winners will be announced on that social media platform, so check back to see if you won!  (For blog entries I will also e-mail the winner.)

If you aren't really interested in giveaways, but love to SAVE MONEY you can get the above resource for 50% off until the end of the giveaway (July 3rd at 5:00)!  That is a savings of $6! Click the HERE button above to find the unit.

Thank you in advance for taking part in this giveaway!  Your participation makes these giveaways fun for me and hopefully fun for you.  :)

Don't forget...  come see me on Facebook tomorrow and be thinking of a friend you would like to tag!

Until then,

UPDATE...

Thank you for participating!  The winner of my high tech drawing  (I drew a name out of a paper bag) is.... 


If you would like another chance to win, visit my Giveaway post on Facebook tomorrow (July 2nd)!  Like the post and tag a friend!


Wednesday, June 3, 2015

Stained Glass Selfies


Add some color and fun to your classroom with Stained Glass Selfies.  This blog post takes you step by step through the art project with full color photos.


Last week, I pulled out some pictures I had taken of my students toward the beginning of the school year and decided to use them for an art project to decorate our hall these last couple of weeks!

The project is actually quite easy if you have the materials.  For this project you will need:
1.  Transparency film.  My school actually had several boxes of these sheets gathering dust in a closet.  Now that many schools use document cameras, rather than overhead projectors, you might get lucky and find a box hiding away at your school!  You will need one sheet of film for each student.
 2.  Acrylic paint.  Nothing fancy, just several bright colors.
3.  Sharpie or other fine point permanent markers.  One for each student.  
4.  Plates to put paint on and Q-tips to use as paint brushes.
5.  Masking tape
6.  Photos of your students printed as full, 81/2 x 11, black and white sheets
7.  Plain white copy paper.  One for each student


Okay...  now that you have all of your materials, it is time for the fun to begin!  

It is always a great idea to try out the project yourself first.  This helps you plan your timing, work out any kinks, and it gives you a finish example to share with your students!  


I also always model for my students how to do the project.  for this project, first I showed students how to tape things down and trace their faces. 

PHASE 1
Step #1 - Hand out the photos to your students and after the giggling has subsided, have them tape them down to their desks or table.  Just a little tape on each corner will be fine.  This is just to keep the photo from shifting.  

Step #2 - Now, distribute the transparency sheets.  Students need to tape the transparency sheets over the top of their photographs.  I suggest just taping three of the corners, leaving one of the corners untaped.  This lets students slide the white copy paper between their photos and the transparency to check their tracing.  

Step #3 - Students are now ready to trace.  I always tell my students to look for and trace around the big shapes.  They shouldn't trace every hair and line.  They need empty spaces.  Anything that you want black, such as the pupils of the eyes, should be colored in with the Sharpie marker.  

PHASE 2

While students are tracing, I walk around and put blobs of paint on the plates at students' tables.  I usually put out two plates for a table of 4 with several choices of colors.  Along with the paints, give students several Q-Tips.  

Advice - I always tell my students to NOT mix the colors.  Only use the Q-tips for the colors they are for.  At the end of the project, when most students are done, I let students mix up the colors a bit for their backgrounds.  

Step #4 - without untaping the transparency film students begin using the Q-tips to paint in their shapes.  Students can use many different strokes:  dabs, swirls, contour lines, etc.  A suggestion is to use the darker colors first and let dry a bit before moving on.  The same for shapes that are directly next to each other; paint in one shape, let dry, then paint in the other shape.  If the paint is a bit dry, it is okay to go over the margins a bit.  This side of the painting is the backside.  When you turn the painting over, all of the marker lines will still show, so students shouldn't worry about covering the lines.  

Step #5 - Have the students add a background.  If you are going to let your students write something, remember that this is the backside of the painting and they will need to write anything in reverse for it to appear correct when displayed.


Step #7 - Let paintings dry.
Step #8 - Display the paintings in a window or on a white background for the colors to really POP!


My students really enjoyed this project!  Because of timing,  we only did the artwork, but I can see how this could lend itself to writing about themselves at the beginning of the year.  Another idea is to take the pictures on the first day of school and save them.  Bring them out at the end of the school year and have students write about how they have changed during the year.

Whether you plan on doing this project just for the sake of art or to integrate it into writing it will make a wonderful display and keepsake for your students!

I hope that this art idea is one you can add to your "toolbox".  If you have any questions or ideas for integrating this project into other areas of the curriculum, I'd love to hear from you!  Just leave your comment below in the comment section.

Thanks for visiting and I hope you will consider following me on Bloglovin, Facebook, and Instagram for more  art, lesson, and classroom idea posts!